Jul 14, 2020
Top Fixes for a 3D Printer Jam
Got a 3D printer jam? You are not alone! This is the most common issue with FDM/FFF style 3D printing. Here are the most common causes and top fixes for this issue.
What is a 3D printer jam?
In a FDM/FFF style 3d printer there is one (or several) hotends, which heat up to a specific temperature to melt the filament and extrude it out of the nozzle. If your printer seems to have stopped extruding filament during the print process, we consider this an extruder jam (some folks like to call this a clog). If your printer does not have a filament tracking system that is operating during the print process, your printer may look like it is "air printing" a part when it jams (i.e. moving around without any plastic coming out).
Most common causes for a 3D printer jam:
The hotend and extruder system is the the heart of a 3D printer and is usually composed of many components that have to work completely in perfect synchrony to properly extrude your filament. When it is working well, you never think about it. When you have a failure, it becomes painfully obvious how complex these systems are.

Possible Cause #1 - Filament
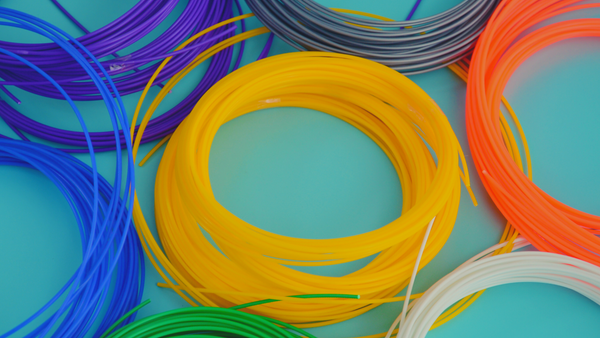
The material you melt when 3D printing is called filament. While you may be using the same material type, not all vendors are creating filament equally. Here are some things to consider in the spool itself:
| ISSUE | FIX |
| Filament is twisted/knotted on the spool | Carefully unwind the filament and rewind on the spool. The only way a twist/knot can occur is during the filament loading process, so you need to be careful that does not happen again. |
| Filament has an inconsistent diameter | Measure the filament with a caliper at various lengths down at least 2m of material. If you see a variation of more than +/- 0.04mm you will likely see problems with your prints. We recommend to discard this filament and find a more trustworthy brand. |
| Poor quality filament | Filament may not be made from virgin plastic, leading to a non-homogeneous material with varying melt temperatures. You may need to ask the manufacturer about this. If you learn that the filament has a large regrind ratio, we recommend to discard this filament and find a more trustworthy brand. |
| Old filament | Filament may be old, which can make many materials brittle and crack easily. If you see cracks or breaks in your filament (usually in the feed tube to the extruder) it is time to replace your filament. Even well regarded filaments suffer degradation over time. |
| Wet filament | Filament may be wet - many filaments absorb moisture from the air and need to be printed in a dry box. If your filament is wet, you will sometimes see steam out of the nozzle when printing or the filament will sound like "snap, crackle, pop" and might have small bubbles in it when leaving the extruder. In this case, you may be able to dry your filament in an oven (usually 70C for more than 4hrs does the trick). If you had moisture once, you will have it again. Invest in a humidity sensor (target 30% or less) and a dry box. |
Possible Cause #2 - Filament Path
Usually when there is an extruder clog the first place we look is the nozzle / hotend or the extruder. We will get to these as they are major sources of issues, but the filament path may also be the culprit. The filament path adds drag to the system, which in turn makes the hotend work harder to extrude filament.
| ISSUE | FIX |
| Too much friction in the spool holder | Spool holders come in all kinds of flavors from a simple bar to hang your filament to complex mechanisms to reduce friction. Generally, the spool should easily unwind from the spool holder. If you are seeing to much friction, consider investing in or creating your own bearing based spool holder to reduce friction. |
| Incorrect unwind orientation | Like the age-old debate about toilet paper, there is a right and a wrong way to unwind a spool of filament. The key here is to look at the path of filament into the printer and make sure that there are no unnecessary twists of bends caused by the spool orientation. |
| Spool is too large for your spool holder | Even a good spool holder can get overloaded. Remember the friction in your system will be proportional to the weight of your spool. Larger spool, means more friction in your spool holder. |
| Too much resistance in the filament guide tube | Most printers have a filament guide tube from the spool holder to the hotend. Depending on your printer extruder configuration, you may even have two different sections of tubing. This tube is much more critical than most give it credit. If the tube is of poor quality or the wrong material, it can wear down over time and build friction. If it is too thin or damaged, it can have kinks which add friction in the system. The solution here is to replace the tube with a high quality replacement - usually a larger ID in the tube is better, allowing the filament room to move without adding friction from a tight fit. Do not try to lubricate filament with oils or other "tricks", this just contaminates your hotend. |
Possible Cause #3 - Extruder
Assuming that your material is good and the path to the extruder does not have any issues, then the next place to focus is on the extruder mechanism itself. This is the mechanical part of the printer, connected to a stepper motor, which grabs the filament and pushes it out.
| ISSUE | FIX |
| Drive wheel damaged or dirty | The drive wheel is an unsung hero of the extrusion process. It should have clean / sharp teeth with no noticeable deformation or wear areas. If you see debris, clean with a wire brush. If you see damage, replace immediately (this will happen more regularly with reinforced materials like Carbon Fiber Nylon) and consider replacing your standard drive wheel with a hardened drive wheel. |
| Tension the filament too low / too tight |
If the tension is too high, you will see a "crescent moon" shape cut from your filament or you will hear the extruder stepper motor "click" as it misses steps. If the tension is too low, you will not see filament extrude as commanded, but you will easily be able to push the filament through with your fingers. To fix this, carefully adjust the tension to be just right. Some extruders have an adjustable tension system. If this is the case for you, then you may want to consider replacing the spring which presses on the filament, as it is the source of tension for extruding filament. |
| Extruder fan / water cooling not working | Many materials soften during the printing process. This can be made worse if you are printing with a closed chamber and high melt temps. To battle this, many extuders have fans or water cooling systems to remove heat from the filament before it hits the hotend. If your cooling system is damaged or not working optimally, then the filament will be soft before it gets to the hotend. This usually results in a clog. |
| Debris in the extruder mechanism | If you have had failed prints in the past, it is very likely that some small bits of filament have found their way in to the extruder mechanism. If this happens, then it can cause undue stress on the system, which can result in weak or non-existent extrusion. To fix, disassemble the extruder mechanism, remove debris and dust with a brush and carefully reassemble. |
Possible Cause #4 - Hotend / Nozzle
The hotend/nozzle is usually the first place that folks look at when a 3d printing jam occurs, and for good reason, as this is really the last stop before the plastic morphs from filament to your 3D printing object. There are hundreds of different types of hotends out there, and we cannot possibly cover all of them in this list, so we will focus on hotends that are roughly based around the e3D v6 hotend (also used on most German RepRap 3D printers). Given the large amount of possible variables in the hotend, we suggest replacing the hotend completely if your troubleshooting leads you here.
| ISSUE | FIX |
| Teflon tube in hotend is damaged / bent | Remove the hotend and inspect the tube. If you see any bent areas, burned areas or areas with melted filament replace with a new tube, making sure that it is high quality for proper heat resistance. |
| Cooling fan is not working properly | If this fan is not working, then the filament gets too hot before the meltzone, allowing for heat creep into the hotend, which in turn melts filament in areas where it should not get hot. In this case you will need to replace the fan and consider replacing the hotend as it will need to be completely disassembled and rebuilt to remove melted filament. |
| Heater block / nozzle is loose | This can happen, especially when a hotend is new. The assembly of the hotend is effectively a sandwich between the heat break and the nozzle meeting in the heater block. If either is loose or expands/contracts with temperature it can be loose. If caught before a jam, you can simply re-tighten the nozzle. If caught after a jam, the hotend should be replaced. To fix, the hotend would need to be disassembled, and all threads will need to be tapped with a threading tool to remove melted filament from the heater block threads. |
| Heat break is bent | This can happen when tightening the nozzle. If you suspect a bend, replace the heat break and/or the entire hotend. A bent heat break adds friction and leads to unpredictable print results. |
| Heat break is jammed | The heat break should never have melted filament in it. If you find this is the case, you likely have a cooling problem as well. You will need to replace the heat break / hotend and replace the fan. |
| Nozzle is blocked / dirty | This can be caused by a myraid of reason - bad filament, poor printer hygiene (you should brush the nozzle with a brass brush after every print) or failed prints getting stuck to the nozzle. To fix, first clean the nozzle to look like new from the outside. Next heat up the nozzle to temp and apply pressure to the filament with your fingers, usually this will push through a clog. If you cannot manually push filament through, consider replacing the nozzle or entire hotend. |
| Mixed materials in hotend | We recommend dedicating a nozzle to each material as a precaution. This helps to prevent issues from mixing materials in a single nozzle. If you have mixed materials, you may need to purge the hotend at the highest melt temp of any material printed in that hotend. If this does not work, consider a complete hotend rebuild or replace the hotend. |
| Heater cartridge is damaged | If this is damaged, the filament will heatup too slowly. In this case, replace the heater cartridge or entire hotend. There is no quick fix to repair a damaged heater cartridge. |
| Thermistor is loose / damaged | This is the most delicate part on a 3d printer and is very commonly the root cause of a printer clog. The wires close to the heater block may be damaged, the insertion in the heater block may be loose or the electrical connection to the printer may be loose. In any of these cases, it can cause your printer to show a "decouple" error. In this case, the best fix is to replace the hotend. It is possible to replace a thermistor, but requires some wiring skills to do it right. |
Possible Cause #5 - First Layer
The first layer is the most critical layer of any print. Think of it as the foundation of your print. If it is shaky, then the print above will be weak as well.
| ISSUE | FIX |
| First layer is too close | If the first layer is too close, the filament will not be able to fully extrude from the hotend. This causes the hot plastic to back up and cause problems by forcing molten plastic in places it should not be. A printer with a filament tracking system will find this error automatically. If you do not have this system, then you need to monitor the first layer. A little squish is ok, too much is a problem. Think of the filament on the first layer looking like a fettuccine noodle for best results. |
| Build plate is not level | If the buildplate is uneven or not level, it is impossible for the first layer to go down consistently. If this is the case, the hotend can jam and force molten plastic where it should not be. The fix is to level the build plate using a feeler gage for consistent results. |
Possible Cause #6 - Slicer Settings
If you can eliminate all of these possible mechanical issues, then the next place to check is your slicer settings. Keep in mind that your settings should remain fairly constant when you stick with a reputable filament manufacturer.
| ISSUE | FIX |
| Temperature too low | If you print too low, the filament will not be able to force filament out of the nozzle. To find the best filament temperature we recommend manually adjusting the temp by 5 degrees until the proper temp is found. Keep in mind that temperature is relative, so it will vary slightly from printer to printer. |
| Printing too fast | If you attempt to print too fast, the printer may simply not be able to keep up. If you recently adjusted speed, slow it back down and check results. |
| First layer adjustment too close | The slicer allows you to make adjustments for the first layer digitally. If your nozzle keeps jamming on the first layer, check to see if you accidentally set the first layer thickness to be too close for your printer setup and leveling. |
| Layer thickness too thin | Thin layers look great, but they can be extra challenging. A layer that is too thin at the start of a print can cause a jam. If this is the case, setup multiple processes so that your first few layers print thicker than the following. This gives your print a solid foundation. |
| Filament diameter is not correct | This simple variable may seem trivial, but all math in the slicer is based on it. If this is off, then everything in your printer slicer will be off and illogical. |
| Extrusion multiplier is wrong | The extrusion multiplier is the setting that can be adjusted to make sure that the proper volume of material is coming out of the nozzle. There are very specific calibrations that should be done to get this just right. If this was accidentally adjusted up or down your printer may be extruding to much or too little filament, leading to a jam condition. |

