Direkt zum Inhalt
Bild wird geladen:

NEED TO VERIFY PARTS WITHOUT A METROLOGY LAB?

Bring inspection in-house without the complexity.

With the right scanner and inspection software, you can quickly compare parts to CAD, measure critical features, and verify builds without outsourcing every check.

Bild wird geladen: Polyga Carbon 3D Scanner - 3DChimera Polyga Carbon 3D Scanner - 3DChimera

SCALING INSPECTION ACROSS PRODUCTION OR QUALITY TEAMS?

When accuracy, repeatability, and throughput matter.

As production grows, inspection becomes infrastructure.

Higher accuracy scanning, stable tracking, and inspection-grade workflows allow teams to standardize measurements, support QA, validate tooling, and monitor production with confidence.

Bild wird geladen:

Have a part you want us to inspect?

Outsource scanning and inspection when speed matters.

Our inspection services support one-off projects, supplier validation, failure analysis, and overflow inspection needs. You send the part. We scan it, inspect it, and deliver usable data and reports.

INSPECTION AND QUALITY CONTROL Solutions

CHOOSE THE RIGHT INSPECTION PATH

Whether you’re starting inspection in-house, scaling quality operations, or outsourcing measurements, choose the path that fits your operation.

STARTER PATH

Starter

In-house inspection for teams getting started with quality control.

Starting at $10k+

  • CAD comparison and basic inspection
  • Fast, portable part verification
  • Ideal for engineering and small QA teams

System includes

  • Shining3D Combo+
  • Shining3D Inspect software
  • Setup guidance and first-use support

Advanced Production

 Advanced

Production-grade inspection for accuracy, repeatability, and scale.

Starting at $20k+

  • Higher accuracy and stable tracking
  • Inspection across larger parts and assemblies
  • Built for manufacturing and QA environments

System includes

  • UE Nova Trak
  • Shining3D Inspect software
  • Workflow configuration + first-project support

custom services

Custom

We scan and inspect parts for you when speed matters.

Starting At Contact Us

  • Professional 3D scanning and inspection
  • CAD comparison and deviation analysis
  • Manufacturing and quality reports

Caption

Service includes

  • Part intake and inspection planning
  • High-accuracy scanning and processing
  • Inspection reports and delivered datasets
  • Files provided in your required formats
OUR PROCESS

We capture accurate 3D data and turn it into actionable inspection results so you can verify parts, validate builds, and control quality with confidence.

1
Understand Your Needs
We start by understanding your part, your tolerances, and what you actually need to verify.
2
Select the Right Scanner
With over a dozen specialized scanners available, we match your project to the perfect tool for the job.
3
Acquire the Data
Parts are scanned using structured light or tracking systems, then processed into clean, accurate 3D data ready for inspection.
4
Clean Up & Optimize
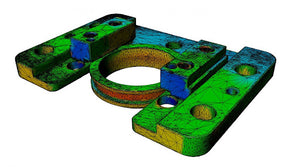
We run inspection routines against CAD or nominal geometry, generating deviation maps, measurements, and reports aligned to your quality requirements.
5
Deliver Report
Inspection results are compiled into clear reports with deviation maps and dimensional data.

Ready to take the next step?

Learn more about our services and how we can help you grow.

BOOK CONSULTATION
Back to top