Apr 27, 2024
Simplifying SLS Part Dyeing: The Traditional Pot Dye Method
The Intricacies of Traditional Pot Dyeing for SLS Parts
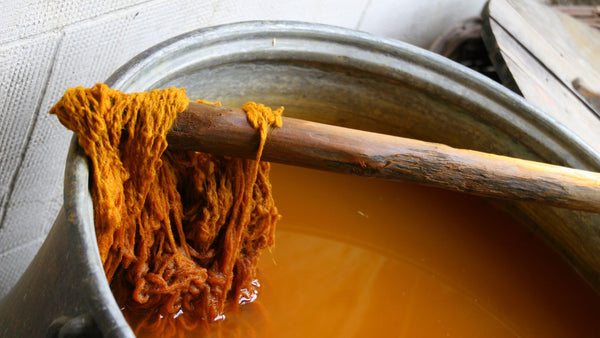
Dyeing SLS (Selective Laser Sintering) parts using the traditional pot dye method is a craft that requires precision, patience, and a fair bit of expertise. To begin, you'll need a variety of tools and materials: a large stainless steel pot, acid dyes suitable for nylon or polyamide, protective gear, and more. Here’s a step-by-step look at the complexities involved:
-
Setup and Preparation:
- Thoroughly clean the parts to remove any residual sintering powder.
- Preheat the parts, a step that can be crucial depending on the material's characteristics.
-
Mixing the Dye Bath:
- Heat water in the pot to a precise temperature, which can vary significantly depending on the specific dye and material (usually between 60°C and 100°C).
- Carefully measure and mix clothing dye into the water, ensuring it's fully dissolved to avoid uneven coloring. The exact brand and ratio of dye to water will vary based on the material you want to dye.
-
Dyeing Process:
- Maintain a constant watch to ensure the temperature remains steady, adjusting the heat source as necessary—a task that requires constant attention.
- Stir continuously to prevent parts from sticking to each other or the bottom of the pot, which can lead to inconsistent dye uptake.
-
Post-Dye Handling:
- Once dyed, parts must be rinsed meticulously to remove excess dye, a process that can be time-consuming and messy.
- Dry the parts thoroughly, ensuring no moisture remains that could affect the finish.
The traditional pot dye method, while effective, is fraught with potential pitfalls and requires a meticulous approach to achieve consistent results.
The Dyeformer: A Streamlined Alternative
In contrast, the Dyeformer system, developed by 3DChimera, simplifies the dyeing process dramatically. Here’s how:
-
Effortless Setup:
- Fill the tank with water & pre-mixed dye, run a preheat cycle, then simply place the parts in the Dyeformer’s basket and close the lid.
-
Automated Dyeing Process:
- The Dyeformer is pre-programmed with the correct temperature, flow rate and time for your parts so there are no settings to adjust. Simply press start, and the Dyeformer automatically heats and circulates the dye, ensuring even distribution and consistent color.
-
Clean and Simple Post-Processing:
- Once the cycle completes, the system cools down automatically. Remove the parts, give them a quick rinse, and they're ready to go—no fuss, no mess.
The Dyeformer not only simplifies each step but also removes the need for continuous monitoring and manual adjustments, making the dyeing process nearly hands-off.
Benefits and Ideal Users of the Dyeformer
The Dyeformer offers numerous benefits over traditional pot dyeing:
- Consistency and Quality: Automated controls ensure that each part receives the same treatment, resulting in uniform color.
- Time and Labor Savings: Significantly reduces the hands-on time required to dye parts.
- Safety and Cleanliness: Enclosed system minimizes exposure to chemicals and heat.
- Scalability: Easily handles larger batches, making it ideal for high-volume operations.
Who Benefits Most?
- Professional 3D Printing Operations: Businesses that require a quick turnaround and consistent quality to satisfy customer demands.
- Educational Institutions and Research Facilities: Where safety and reliability are paramount.
- Hobbyists and Makerspaces: Those looking to streamline their processes and produce professional-level results.
For anyone regularly involved in dyeing SLS parts, the Dyeformer represents a significant advancement in reducing complexity and enhancing productivity, proving that sometimes, the best solution is also the simplest.